偶然看到这篇文章,觉得写得很好,简单明了,所以尝试将其翻译一下。
如果你想创作一个用列表显示数据的Android应用,Android L提供了两个让你更容易实现的新特性:RecyclerView和CardView。通过用这些控件,可以很容易让你的app符合Google的Material Design规范。
创作APP时一个模板参考的好地方:Envato market。你可以找到成千上万的APP模板,从Youtube到obstacleavoidance game。
或者你可以尝试一下通用的Android app模板,它能为你创作任何种类app提供一个坚实的基础。
前提
为了继续,你应该使用最新版本Android Studio。你可以从Android 开发者官网获得它。
支持老版本
在写这篇文章时,只有少于2%的Android设备运行在Android L上。无论怎样,多亏v7 Support Library,你能使用RecyclerView和CardView控件运行在老版本的安卓设备上面,通过在你工程中build.grade文件添加如下依赖片段实现:
1 | compile 'com.android.support:cardview-v7:21.0.+' |
创建CardView
CardView是一个ViewGroup,像其他ViewGroup一样,它能通过Layout xml文件添加到你的 Activity 或者 Fragment。
为了创建一个空CardView,你应该添加如下代码片段到你的layout XML文件中:
1 | <android.support.v7.widget.CardView |
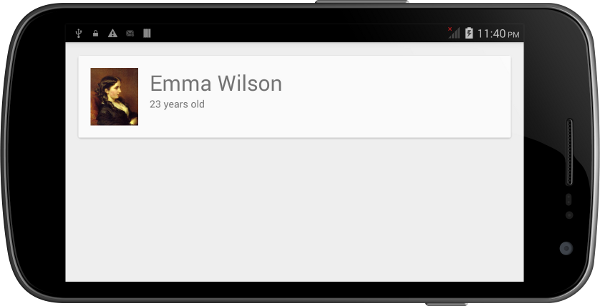
最为一个更实际的例子,咱们创建一个LinearLayout并将CardView作为子控件放在里面。CardView可以代表一个人,包含如下信息:
TextView - 显示人名
TextView - 显示年纪
ImageView - 显示照片
xml内容如下:
1
2
3
4
5
6
7
8
9
10
11
12
13
14
15
16
17
18
19
20
21
22
23
24
25
26
27
28
29
30
31
32
33
34
35
36
37
38
39
40
41
42
43
44
45
46
47
48
49
<LinearLayout xmlns:android="http://schemas.android.com/apk/res/android"
android:layout_width="match_parent" android:layout_height="match_parent"
android:padding="16dp"
>
<android.support.v7.widget.CardView
android:layout_width="match_parent"
android:layout_height="wrap_content"
android:id="@+id/cv"
>
<RelativeLayout
android:layout_width="match_parent"
android:layout_height="wrap_content"
android:padding="16dp"
>
<ImageView
android:layout_width="wrap_content"
android:layout_height="wrap_content"
android:id="@+id/person_photo"
android:layout_alignParentLeft="true"
android:layout_alignParentTop="true"
android:layout_marginRight="16dp"
/>
<TextView
android:layout_width="wrap_content"
android:layout_height="wrap_content"
android:id="@+id/person_name"
android:layout_toRightOf="@+id/person_photo"
android:layout_alignParentTop="true"
android:textSize="30sp"
/>
<TextView
android:layout_width="wrap_content"
android:layout_height="wrap_content"
android:id="@+id/person_age"
android:layout_toRightOf="@+id/person_photo"
android:layout_below="@+id/person_name"
/>
</RelativeLayout>
</android.support.v7.widget.CardView>
</LinearLayout>如果这个xml文件被用作Activity的layout,并且给TextView和ImageView*设置有意义的值,那么在Android设备上面它看起来应该像这个样子:
创建RecyclerView
在Layout中定义它
使用一个RecyclerView实例有一些复杂,但是在layout xml中定义它十分简单。可以定义如下:
1 | <android.support.v7.widget.RecyclerView |
通过如下代码片段在你的Activity中去获得句柄:
1 | RecyclerView rv = (RecyclerView)findViewById(R.id.rv); |
如果你确定RecyclerView的大小不会改变,你可以添加如下语句:
1 | rv.setHasFixedSize(true); |
使用LayoutManager
和ListView不一样,RecyclerView需要一个LayoutManger去管理其子项的位置。你可以通过继承RecyclerView.LayoutManager类定义自己的LayoutManager。不过,大多数案子里面,你直接使用如下预定义的LayoutManager子类就可以了:
- LinearLayoutManager
- GridLayoutManager
- StaggeredGridLayoutManager
在这篇教程里,我将使用LinearLayoutManager,它默认将让你的RecyclerView看起来像一个ListView。1
2LinearLayoutManager llm = new LinearLayoutManager(context);
rv.setLayoutManager(llm);定义内容
和ListView一样,RecyclerView也需要一个适配器去接入数据。但是在创建适配器前,我们先创建我们需要的数据。创建一个简单的类来代表一个人然后写一个方法来初始化一个Person对象集:1
2
3
4
5
6
7
8
9
10
11
12
13
14
15
16
17
18
19
20
21
22
23class Person {
String name;
String age;
int photoId;
Person(String name, String age, int photoId) {
this.name = name;
this.age = age;
this.photoId = photoId;
}
}
private List<Person> persons;
// This method creates an ArrayList that has three Person objects
// Checkout the project associated with this tutorial on Github if
// you want to use the same images.
private void initializeData(){
persons = new ArrayList<>();
persons.add(new Person("Emma Wilson", "23 years old", R.drawable.emma));
persons.add(new Person("Lavery Maiss", "25 years old", R.drawable.lavery));
persons.add(new Person("Lillie Watts", "35 years old", R.drawable.lillie));
}创建适配器
要创建一个RecyclerView可以使用的适配器,你必须继承RecyclerView.Adapter。这个适配器遵循View holder设计模式,也就意味着你需要定义一个类继承与RecyclerView.ViewHolder。这种模式最大限度减少调用findViewByIdea方法。
前面我们已经在 XML Layout中定义了一个CardView代表一个人。我们将重复利用此布局文件。在我们自定义ViewHolder的构造方法中,初始化此视图属于RecyclerView的子项。
1 | public class RVAdapter extends RecyclerView.Adapter<RVAdapter.PersonViewHolder>{ |
接下来,为自定义适配器增加一个构造方法来处理RecyclerView显示的数据。我们的数据有Person对象集组成,添加如下代码:
1 | List<Person> persons; |
RecyclerView.Adapter有三个抽象方法必须被重写。咱们从getItemCount方法开始。这个方法返回子项存在数据的数量。对于我们由List形成的数据,我们只需要调用List对象的*size()*方法即可:
1 |
|
接下来,重写onCreateViewHolder方法。正如方法名所展示,当自定义ViewHolder需要被初始化时调用。我们指明RecyclerView每个子项使用的布局。通过使用LayoutInflater完成,传递着结果到自定义的ViewHolder的构造方法。
1 |
|
重写onBindViewHolder方法去指明每一个RecyclerView子项的内容。这个反复与ListView的适配器的getView方法十分相似。在我们的例子中,你必须设置CardView中的名字、年纪以及照片。
1 |
|
最好,你需要重写onAttachedToRecyclerView方法。我们就简单实用地直接调用父类的实现。
注:新版本已经不需要重写此方法。
1 |
|
实用适配器
现在适配器准备好了,接下来就是让Activity通过适配器构造函数和RecyclerView的setAdapter去初始化和使用这个适配器了。添加如下代码:
1 | RVAdapter adapter = new RVAdapter(persons); |
编译及运行
当你在你的Android设备上运行这个例程时,你将会看类似如下图片的结果: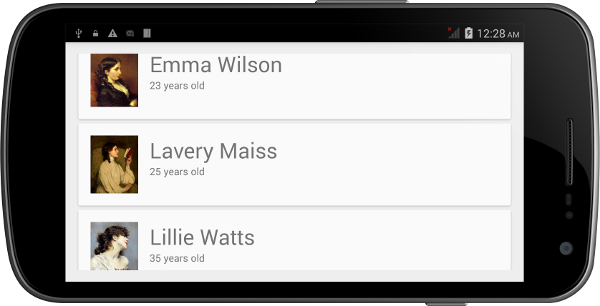
结论
在这篇教程,你已经学会了怎么去使用在Android L中引入的CardView和RecyclerView控件。你也明白了在Material Design应用中怎么去使用这些控件。注意:通过RecyclerView可以做几乎所有ListView所做的事,不过为了更少的代码,使用ListView仍然是一个比较好的选择。
你可以参考Android Developers reference去获得更多关于CardView和RecyclerView类的信息。
最好,如果你想更快速地开发你的app,不要忘记在Envato Market查看Android app templates。