准备布局文件
布局一:
1
2
3
4
5
6
7
8
9
10
11
12
13
14
15
| <?xml version="1.0" encoding="utf-8"?>
<android.support.constraint.ConstraintLayout
xmlns:android="http://schemas.android.com/apk/res/android"
xmlns:tools="http://schemas.android.com/tools"
xmlns:app="http://schemas.android.com/apk/res-auto"
android:layout_width="match_parent"
android:layout_height="match_parent"
tools:context="me.huaqianlee.forme.ToDoFragment">
<TextView android:layout_width="match_parent" android:layout_height="match_parent"
android:layout_marginTop="50dp"
android:textSize="15sp"
android:text="This is Todo main view layout!"/>
</android.support.constraint.ConstraintLayout>
|
布局二:
1
2
3
4
5
6
7
8
9
10
11
12
13
14
15
| <?xml version="1.0" encoding="utf-8"?>
<android.support.constraint.ConstraintLayout
xmlns:android="http://schemas.android.com/apk/res/android"
xmlns:tools="http://schemas.android.com/tools"
xmlns:app="http://schemas.android.com/apk/res-auto"
android:layout_width="match_parent"
android:layout_height="match_parent"
tools:context="me.huaqianlee.forme.ToDoFragment">
<ImageView android:layout_width="match_parent" android:layout_height="match_parent"
android:scaleType="fitCenter"
android:src="@drawable/lee"/>
</android.support.constraint.ConstraintLayout>
|
准备Fragment,加载布局
布局一:
1
2
3
4
5
6
7
| public class DateEventFragment extends Fragment {
@Nullable
@Override
public View onCreateView(LayoutInflater inflater, @Nullable ViewGroup container, @Nullable Bundle savedInstanceState) {
return inflater.inflate(R.layout.fragment_date_event, container, false);
}
}
|
布局二:
1
2
3
4
5
6
7
| public class ToDoFragment extends Fragment {
@Nullable
@Override
public View onCreateView(LayoutInflater inflater, @Nullable ViewGroup container, @Nullable Bundle savedInstanceState) {
return inflater.inflate(R.layout.fragment_todo, container, false);
}
}
|
实现切换布局方法
1
2
3
4
5
6
7
8
9
10
11
12
13
14
15
16
17
18
19
20
21
22
23
24
25
26
27
|
public class MainViewSwitch {
public void switchMainView(BaseActivity activity) {
switch (SelectedNavItem.getSlectedNavItem()) {
case SelectedNavItem.TODO:
replaceFragment(new ToDoFragment(),activity);
break;
case SelectedNavItem.DATEEVENT:
replaceFragment(new DateEventFragment(), activity);
break;
default:
break;
}
}
private void replaceFragment(Fragment fragment, BaseActivity activity) {
FragmentManager fragmentManager = activity.getSupportFragmentManager();
FragmentTransaction transaction = fragmentManager.beginTransaction();
transaction.replace(R.id.main_view_layout, fragment);
transaction.commit();
}
}
|
切换布局
1
2
3
4
5
6
| adapter.setOnItemClickListener(new NavFuncAdapter.OnItemClickListener() {
@Override
public void onItemClick(View view, int position) {
new MainViewSwitch().switchMainView(MainActivity.this);
}
});
|
这篇博文只是一个简单粗糙的总结, RecyclerView点击事件的实现可以查看博客:RecyclerView选中效果、Item点击事件的实现。
源码地址
ForMe
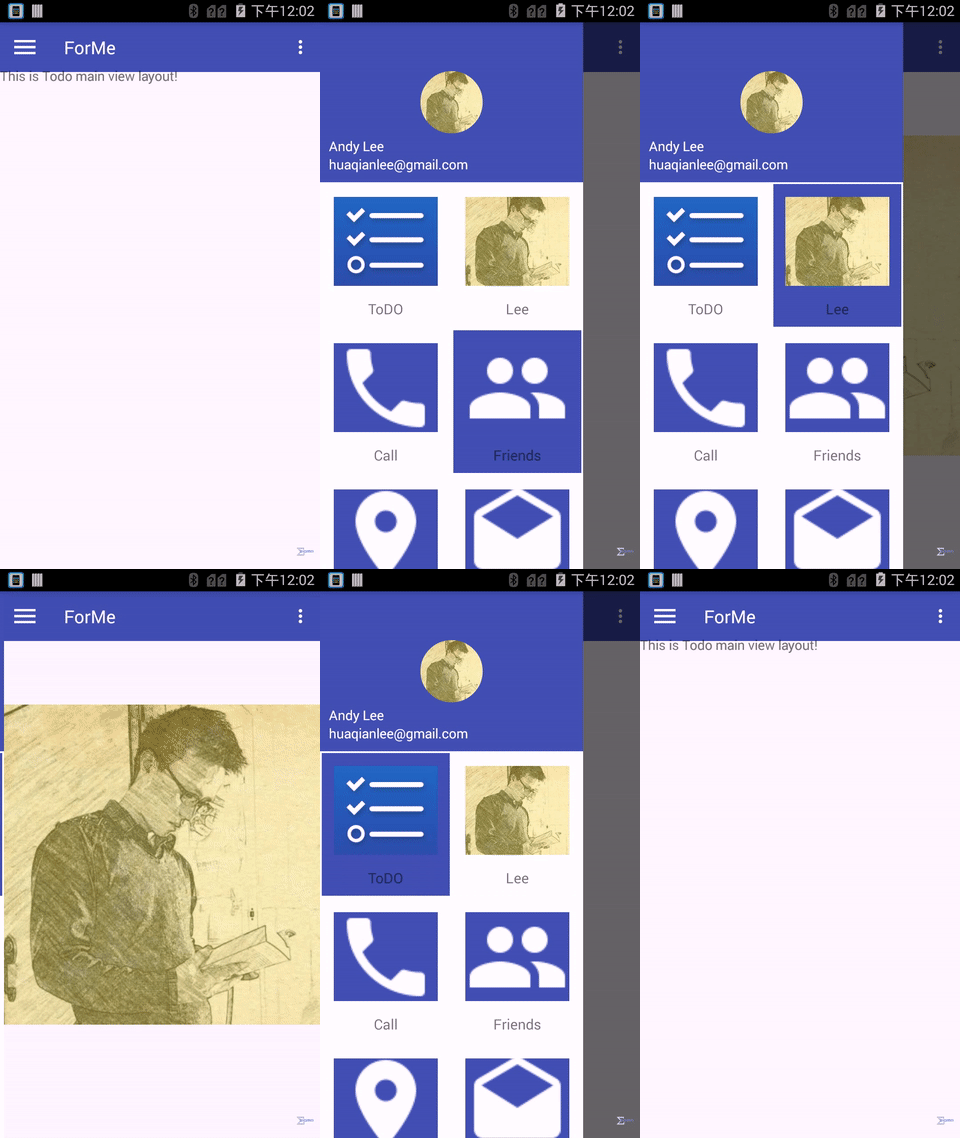
效果

